Lasagna Days are the Best Days

I love being Italian. You wanna know why? I’ll tell you, the food is great. Also passed down pasta sauce recipes. Must I say more? As I was telling you all in my last post about my cakes, I was home for the holidays. When I am home I can ask for whatever I want to eat, because I am only home three times a year. As I continue my endeavors for cooking, photographing, and eating my mother was not going to pass up an opportunity to teach me how to make homemade lasagna.

The beginning, middle, and end was truly a beautiful process.

DSC_3561

Unfortunately, this going to be another post in which a recipe will not be attached. I arrived back to my apartment without the lasagna or sauce recipe to share (well the sauce recipe is one of those things, yah know? You just can’t share the family’s heirloom sauce recipe). However, Ina Garten has a wonderfully easy recipe for lasagna. She has good recipes with great flavor. This is a go to if you are looking to make a lasagna or anything else.

DSC_3587

Don’t forget to let your lasagna rest before you cut into it or else you will have more like lasagna soup!

DSC_3604

Welcome 2015!

This year has already started off with a lot of cooking! One of my New Year resolutions is to keep up with cooking and photographing what I eat. My schedule is a little bit more flexible so I can actually eat dinner at a reasonable time.

I really started to get back into cooking over my winter break. I was able to go visit my parents for a while. It was a truly needed break. Plus, they have a wonderful kitchen, much better than my own. My mother always has all the ingredients to make whatever you want in life. In short, it was good to be home.

Right after New Year’s Eve I made some individual cakes. They were really cute and in the shape of buttercup flowers. They were also some of the tastiest cakes I have made yet. The flower shaped cakelet pan and recipe was from William-Sonoma. They have the Nordic Ware brand that has great non-stick surfaces for baking.

DSC_3530

You can ice the cakes and make them look like flowers. However, I rather fill mine with ice cream and strawberries! It was so tasty!

Unfortunately the cakelet recipe is only for the pan that I have and is owned by William-Sonoma, but I promise you any of the William-Sonoma Nordic Ware pans are amazing and if you get one you wont regret it!

DSC_3540

A Toad in the Hole

DSC_0854

Do you know it by another name? Is a toad in a hole called by any other name taste as good? Of course! Just a moment ago I looked up different names for toad in the hole and I found this website. I am really not sure how many names people actually use, but why question it (well not everything you read on the internet is true…)? But I digress. 

A toad in the hole is my all time favorite breakfast item. I might have said that about french toast, but I momentarily forgot about toad in the holes. I promise…this…this beautiful specimen is my favorite breakfast item. When I was a kid I hated, with a vengeance, the yolk of fried eggs. The only way I would eat it if it was surrounded by bread. Sometimes my parents would oblige, other times I was given a well done over-easy egg.  Which wasn’t as good. 

This glorious breakfast is pretty simple to make so I didn’t go searching through Pinterest for the perfect recipe. I learned this standing next to the stove on Sunday mornings when I was wee kiddo. However, there is an art to toad in the holing. Or egg in a basketing. Whatever you call it. 

Recipe is at the bottom of the post (if you were looking for it).

DSC_0817

The very first secret is…(pause for dramatic effect)…toast your bread first! I have found that if I don’t toast the bread first the egg cooks faster than the skillet can toast my bread. The second secret is buttering both sides of the bread before you throw it on the skillet. The third secret is round cookie cutters. It really makes cutting a hole in your bread that much easier. The fourth secret is garlic powder. 

Okay I am done with secrets. 

DSC_0830

I got some pretty snazzy and cheap assorted round cookie cutters at Bed, Bath, and Beyond. It cuts a decent sized hole. It might be even better if you have a smaller one. If you are making this for your kids you can use shapes! I personally would love getting a toad in the hole that looked like a dinosaur or a heart. 

DSC_0839

Anyway, If you haven’t made a toad in a hole before and a little confused I will leave my recipe right here! 

INGREDIENTS

1 piece of bread
1 egg
Salt
Pepper
Garlic powder

DIRECTIONS 

Place your piece of bread into the toaster,around level 3 or low-medium heat. When bread is toasted take a cookie cutter and cut small to medium area of the middle of the bread out. Make sure to leave most of the bread around the edges (if that makes sense). Spray a skillet with nonstick cooking spray and place it over medium heat. Place toast (with hole) onto the skillet and crack egg into the middle of the bread. Sprinkle with salt, pepper, and garlic powder. Cook on each side for about three to four minutes or when egg is cooked to liking.

DSC_0856

French Toast

Boy, I have been backed up on meals! It has been a crazy week. However, on Sunday (almost a week ago…yikes) my roommate and I were able to enjoy a great, quiet breakfast of french toast. Besides the classic toad in the hole, french toast is my favorite breakfast. It is so yummy! I had never made french toast on my own before, but this was a great time to give it a go.

I kind of improvised with what I knew what my dad does when he makes french toast. So I got together three eggs, some almond milk, vanilla extract, and some cinnamon! It was the perfect Sunday morning breakfast!

The only thing I’d have to say is that it would’ve been a lot better with a hardier bread, but hey, there is always next time for another AMAZING breakfast!

DSC_0728

INGREDIENTS

8 slices of bread (we used whole-wheat)
3 eggs
1/2-3/4 cup of milk (almond milk in my case)
1 tsp of vanilla
1 tsp of cinnamon
butter for pan
Maple syrup for eating

DIRECTIONS

Whisk together eggs and milk. Add and combine vanilla and cinnamon. Heat pan over medium heat and melt butter in pan. Dip both sides of the bread in the egg mixture and put into the heated pan. Cook on each side until golden brown. Replenish butter in pan when needed while cooking.

DSC_0721

Iced Tea + Lemonade

DSC_0702

I love iced tea and lemonade! It is always so delicious and for the most part refreshing! I was introduced to the Tazo Iced Tea series by my mother who also has a deep love for iced tea. When I moved out of my old apartment I found that my previous roommate had left those frozen cans of lemonade. I of course couldn’t wait to make something with it and found that the Tazo Iced Tea I drink has directions for iced tea lemonade. It was a truly joyous occasion!

DSC_0674

The type of iced tea I chose was the iced blushberry black tea which has hints of strawberry flavors. It is super delicious on its own, but figured since it was so good on its own it would probably taste just as good with some lemonade. Minute Maid was what I was gifted from the old roomie. I have made iced tea lemonade with the crystal light packages for pitchers. You just follow the same directions for making tea and then stir in crystal light. Of course the concentrated lemonade is a little more involved but 100 times sweeter.

So, some simple tips for making your own iced tea (if you haven’t done so before). If you are going to use a glass pitcher (I myself am not a person who really likes plastic anything) you need to make sure you warm up the pitcher with hot water. This means filling up your pitcher from your tap all the way up with hot or warm water. This is because you are going to be pouring boiling water into the pitcher later and cold glass with instant hot substance will make it crack!

The directions on the package says you need to boil 32 ounces of water. I have a snazzy kettle that tells me how much water (in cups and ounces) that I am boiling. While the water is boiling this is a good time for you to fill your pitcher with hot or warm water. When the water is just about boiled in your kettle, pour out the warm water from your pitcher and throw the teabag* into the now empty pitcher. Pour the boiling water from your kettle into your warmed pitcher over the tea bag. I like to push the teabag down with some kitchen tongs and leave them there while the tea steeps. The tea steeps for five minutes.

DSC_0678

*Side note: the iced tea has a different tea bag than a hot tea bag. Iced tea bags are larger because you are making a larger quantity than a cup or so.

As you can see 32 ounces of water doesn’t fill the pitcher. If you were making normal tea than you would need to add an additional 32 ounces of cold water to get 64 ounces of tea. This is recommended on the box. Since I want to make it iced tea lemonade, instead of using 32 ounces of water, I need to substitute it for the lemonade. So what I did was I added the 12 ounces of concentrated lemonade from the can and then filled the can twice with water.

DSC_0688

This picture was before the two additional cans of water, but isn’t it pretty?? Make sure that you stir, stir, stir! It is delicious!

INGREDIENTS:

You will need a pitcher that holds 64 ounces of liquid

1 ICED TEA bag (I use Tazo and can be found at your grocery store sometimes but definitely Target)
32-ounces of boiling water
1 can of frozen concentrated lemonade (I used Minute Maid)
2 cans of water (use the concentrated lemonade can)

DIRECTIONS:

Heat pitcher with warm or hot tap water. Meanwhile fill a kettle with 32 ounces of water and boil. When water has boiled pour out the warm water from your pitcher and put tea bag in the now empty pitcher. Pour the boiling water over the tea bag and steep for five minutes. Once steeped, discard tea bag. Add in the can of frozen concentrated lemonade to the pitcher. Use the can concentrated lemonade can and add two full cans of water. Stir! Garnish with lemon if you desire!


Thank you, Tazo Tea for your recipe!

DSC_0712

Today’s Lunch

There is not much to say about sandwich making. Or maybe there is too much to say about sandwiches than can be contained in one post. My dad says that a sandwich is only as good as the bread that it is made on. I’d have to agree, but there are just sometimes when I don’t have awesome bread. So I have decided that sandwich making is only as good as all of its parts. Also, snacks are important in sandwich eating.

DSC_0654

(NOT SO) SECRET SANDWICH SOLUTIONS

1. Great bread. Almost all sandwiches will taste delectable on some fresh baked bakery loaf bread. I’m talking sourdough, Italian, French. Any crusty yet soft bread will be just the best.
2. Dressing. Dress that bread with a good base. I myself enjoy the Hellmann’s Olive Oil mayonnaise. However, if you’re not a mayo kind of person finding what you enjoy on a sandwich will suit just fine.
3. Your choice of lunch meat or vegetarian option. I find that I love a good, fresh lunchmeat. I absolutely love Boar’s Head lunch meat that you can pick up at your grocery store’s deli counter. Not every grocery store sells them, but when they do it’s so worth the price. No preservatives. This sandwich unfortunately does not use my beloved Boar’s Head, but went with what I found in the refrigerator, which was Hillshire Farms. This sandwich has roast beef and I couldn’t be happier.
4. Cheese. I know that I love cheese and will eat it whenever and where ever. However some cheeses taste better on certain things better than others. Pick your cheeses wisely. A roast beef tastes excellent with a provolone, or in my case, Havarti with dill.
5. Add something for that crunch! I love to have a little lettuce in my sandwich. I choose spinach a lot because it is what I have on hand. However, arugula is so divine with a sandwich. Questioning this choice but love arugula? Try it! It is golden. Also if you are an onion person-go for it!

Now, I am pretty sure you are wondering why I posted all this nonsense about a sandwich. Here is my answer: you may be disappointed that your favorite love song was about a sandwich, but I would be thrilled! I love sandwiches!

DSC_0661

Stovetop Macaroni and Cheese

I am always a little wary of stove top macaroni and cheese. I think it’s due to my love, hate relationship that I have had for several years. I get a little anxious when shredded cheese doesn’t melt as quickly as I anticipate it to, but I think I just need to have more accurate expectations. The other day I was looking for something…I don’t even remember what it was, but I stumbled upon this recipe for stove-top macaroni and cheese. It is from damndelicious.net, and boy is it damn delicious! There were a couple things I did differently from the recipe. The recipe calls for fusilli pasta, monterey jack cheese, thyme, evaporated milk, and Emeril’s Essence Creole Seasoning. I didn’t have these ingredients exactly. Instead I used penne, more cheddar and a half cup of mozzarella, oregano, skim milk, and a generic creole seasoning.

DSC_0604


INGREDIENTS

3 tablespoons unsalted butter, divided
1/2 cup Panko
1/2 teaspoon thyme leaves
1 1/2 cup shredded sharp cheddar cheese
1 cup shredded Monterey Jack cheese
1 tablespoon cornstarch
8 ounces fusilli pasta (I had penne and it worked well)
1 (12-ounce) can evaporated milk (normal milk works fine if you don’t have evaporated)
1 tablespoon Emeril’s Essence Creole Seasoning (I used a generic creole seasoning)
Kosher salt and freshly ground black pepper, to taste

DIRECTIONS

Melt 1 tablespoon butter in a small skillet over medium high heat. Add Panko and cook, stirring, until browned and toasted, about 3 minutes; stir in thyme and set aside.

In a large bowl, combine cheeses and cornstarch; set aside.

In a large pot of boiling salted water, cook pasta according to package instructions; drain well. Stir in remaining 2 tablespoons butter until well combined. Stir in cheese mixture, evaporated milk and Emeril’s Essence until cheese has melted, about 2-3 minutes; season with salt and pepper, to taste.

Serve immediately, topped with toasted Panko.

Thank you, damndelicious.net!

A little tip that helped me and hopefully helps you is when you are melting the cheese. Put the pot of pasta, milk, and cheese mixture back onto low-medium heat to help aid in melting the cheese. If you’ve never done this type of macaroni and cheese you cheese is going to bunch up at the bottom. You can stir it a little so that it heats evenly, but eventually on its own its going to change from a solid to a liquid. It will look a lot of oobleck. 

DSC_0619

Avocado Chicken Salad Wrap

DSC_0590

My favorite,favorite type of chicken salad is avocado chicken salad! You may have seen recipes floating around on the internet, and it is absolutely delicious. No mayonnaise; just pure amazingness. Yes, I just used a nonexistent word, it is that good! I found this recipe on the internet at bakersblessings.blogspot.com. The recipe is here! I pretty much do everything exactly to the recipe, but I used dried cilantro. This means you use less because dried herbs are more pungent than fresh herbs! I also used a half an onion and a full lime. 

DSC_0579


I love eating the avocado chicken salad with some tasty crackers, but I also love it in a wrap. Today I heated a Fiber One 80 calorie honey wheat wrap in a pan with some sliced cheddar cheese. When the cheese was melty I took the wrap out of the pan, loaded it up with avocado chicken salad, and topped it with spinach! It is a hearty wrap and so good! 

INGREDIENTS

2 or 3 boneless, skinless chicken breasts
1 ripe avocado
1/4 onion (I use a half of onion)
Juice of 1/2 a lime (I use the whole lime)
2 tablespoons of fresh cilantro (1 tablespoon of dried cilantro)
Sea salt and pepper to taste

DIRECTIONS

Cook chicken breast until done, let cool, shred. Mix all of the ingredients together. 

Thank you bakersblessings.blogspot.com! Your recipe is wonderful!

If you are in need of a fast fix this recipe also works with the frozen Tyson or Perdue (precooked) grilled chicken that is diced or in strips. You would have to cut the strips, but totally worth it if you’re in a pinch!

DSC_0584


White Chicken Chili Night

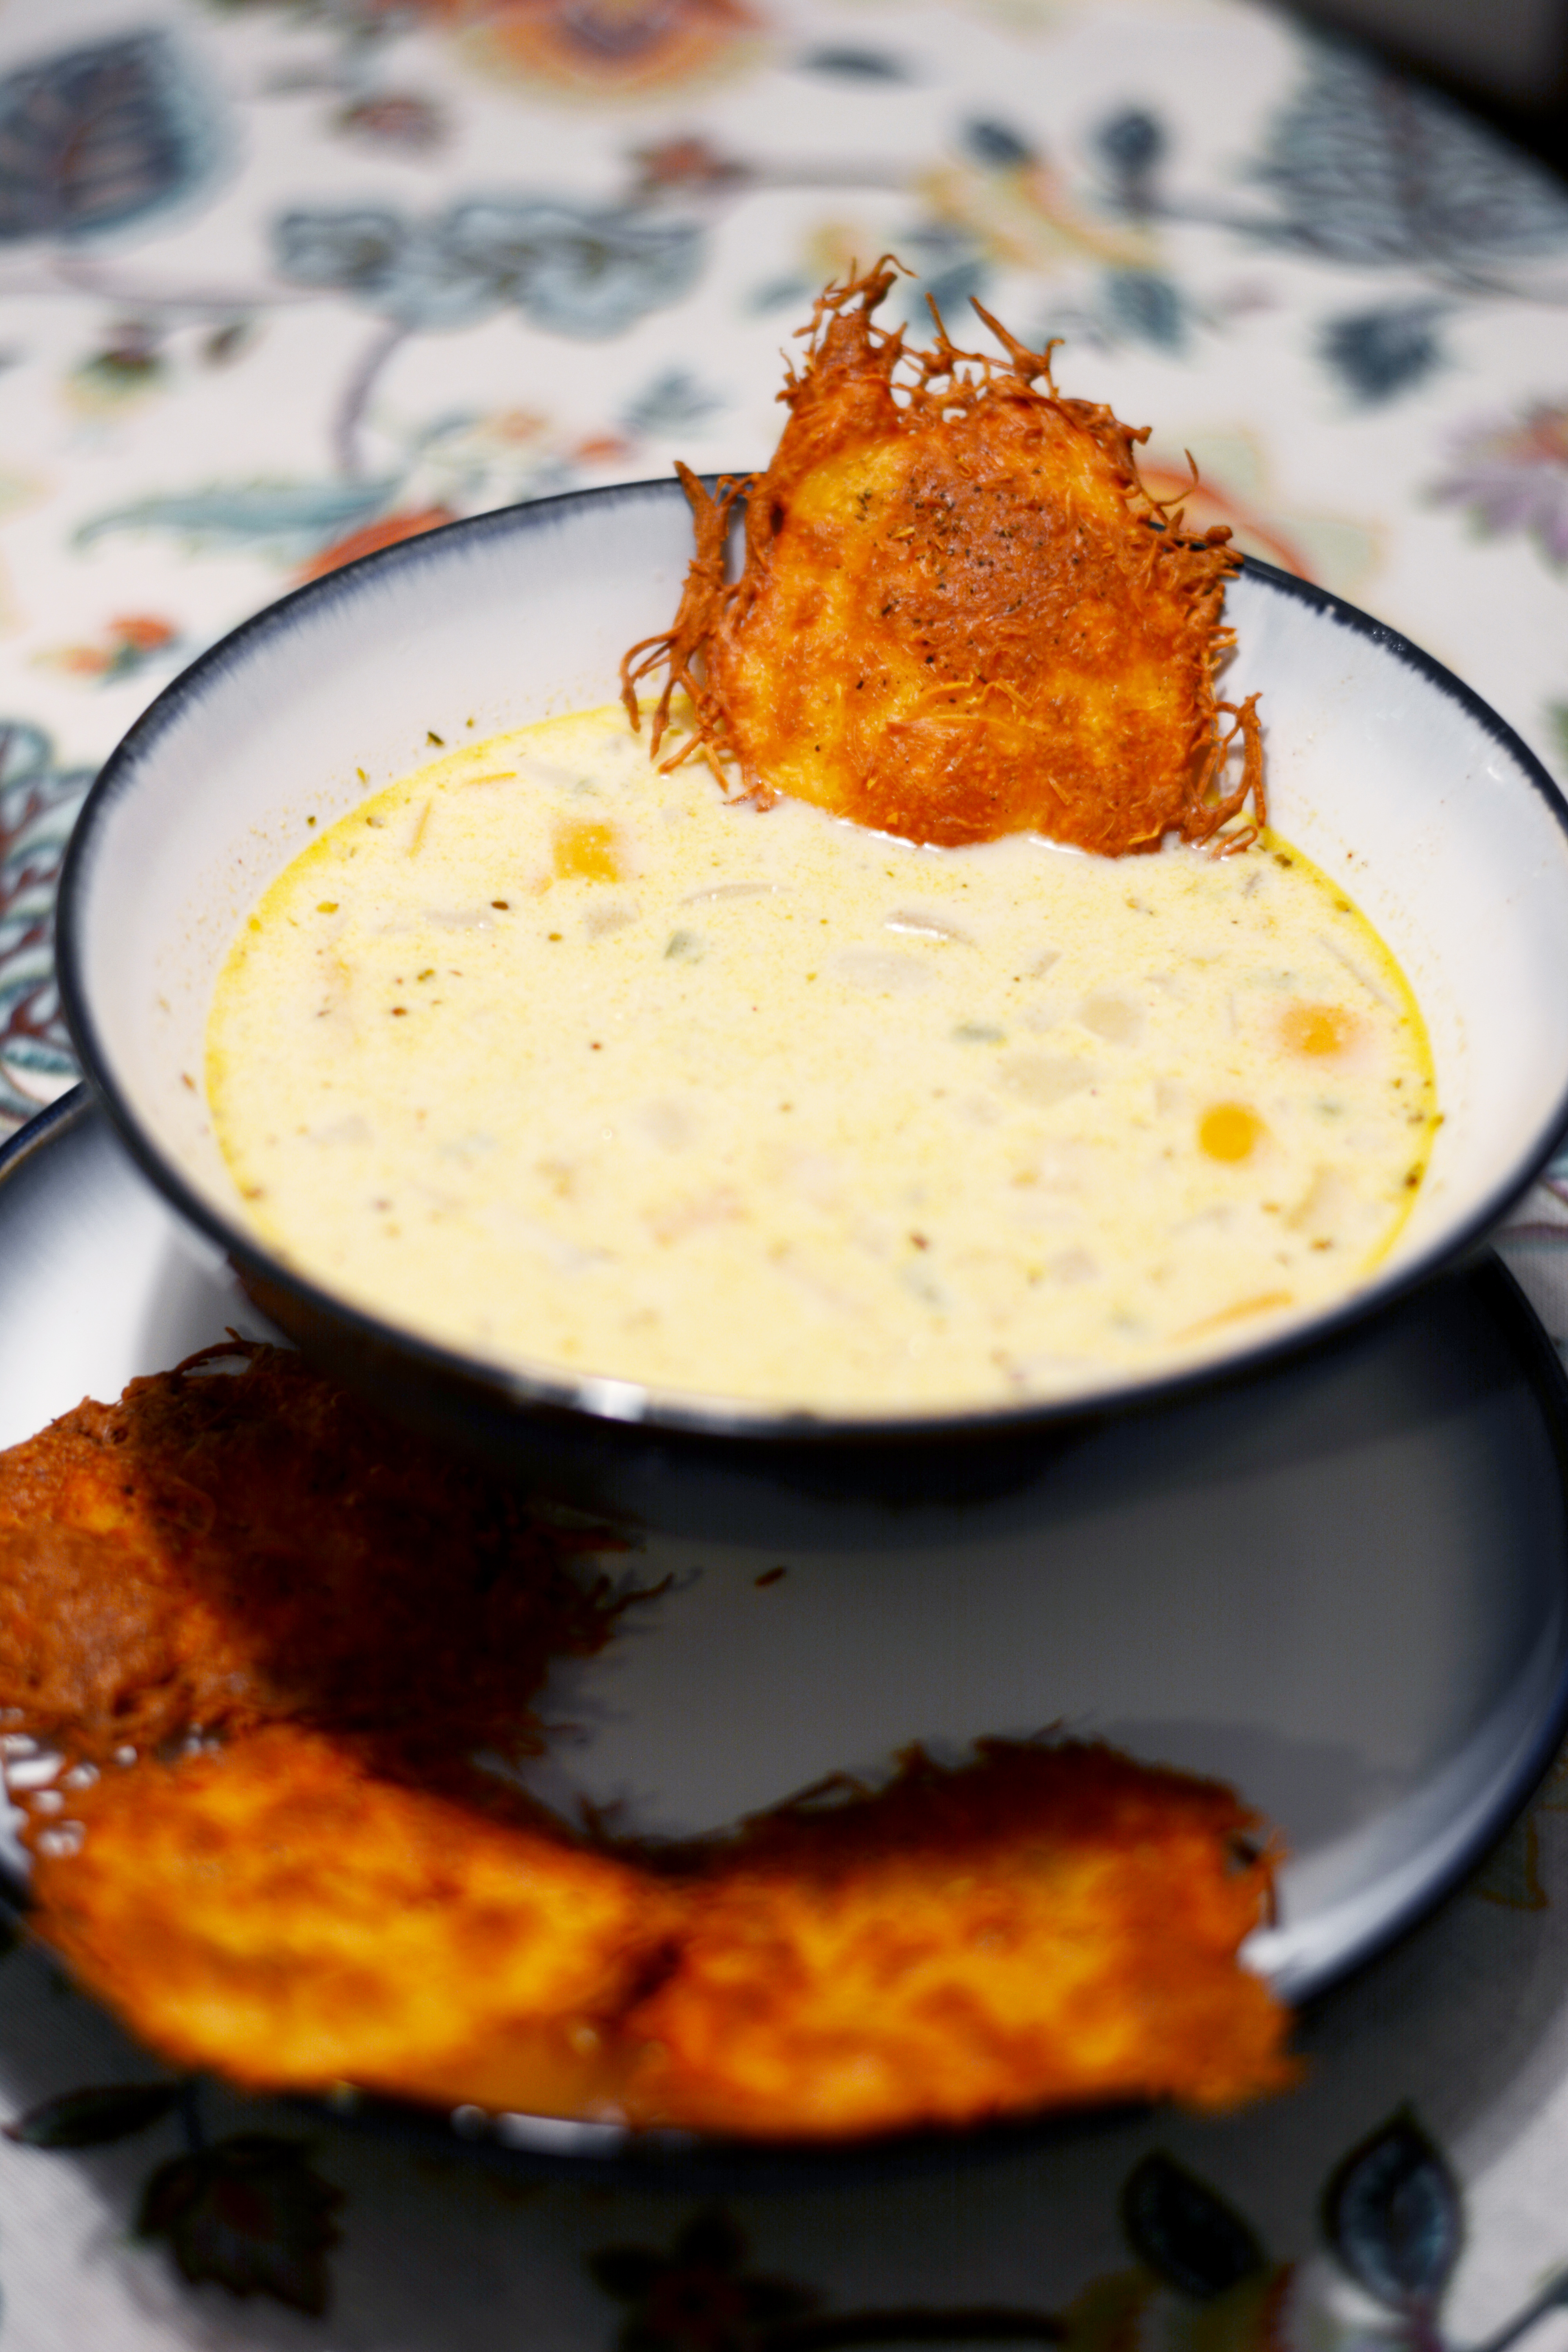
I had a friend once make some pretty scrumptious chicken chili in her crock pot while I was student teaching at her school. I never got the recipe, but always really wanted to make a white chili. Just the other day I decided it was the night! But, I didn’t have a crock pot. Total bummer, but I went to my good friend Pinterest and found one that looked pretty good. Of course it was completely different than my friends. However, it was pretty tasty!

So, without further ado, the recipe I found is right here! The recipe is from http://www.cookingclassy.com! I love their picture for their chili! I wish mine turned out half as pretty! The only thing I did differently was add in jalapenos instead of green chilies, omit the coriander (because I didn’t have any), and I didn’t have Monterrey Jack cheese. Instead of using a different cheese I made cheddar cheese crackers! I also found these in pinterest and the recipe can be found here. The recipe is from nobunplease.com! They are super easy to make and so delicious!

DSC_0453

White Chicken Chili

INGREDIENTS

1 lb boneless skinless chicken breasts, diced into 1/2-inch pieces
1 small yellow onion, diced
1 tbsp olive oil
2 cloves garlic, finely minced
2 (14.5 oz) cans chicken broth
1 (4 oz) can diced green chilies
1 1/2 tsp cumin
3/4 tsp paprika
1/2 tsp dried oregano
1/2 tsp ground coriander
1/4 tsp cayenne pepper
salt and freshly ground black pepper, to taste
1 (8 oz) pkg Neufchatel cheese, cut into 12 slices (aka light cream cheese)
1 1/4 cup fresh corn (frozen works too)
2 (15 oz) cans cannellini beans, drained and rinsed
1 Tbsp fresh lime juice
chopped fresh cilantro, for serving
shredded Monterrey Jack cheese, for serving
tortilla chips, for serving (optional)

DIRECTIONS

Heat olive oil in a 6 quart enameled dutch oven over medium-high heat. Once oil is hot add chicken and diced onion and saute until chicken is no longer pink, about 6 minutes. Add garlic and saute 30 seconds longer. Add chicken broth, green chilies, cumin, paprika, oregano, coriander, cayenne pepper and season with salt and pepper to taste. Bring mixture just to a boil then reduce heat and simmer 15 minutes.

Add Neufchatel cheese and stir until nearly melted (it will break down in little bits and will appear to look like separated cheese but it will eventually melt). Stir in corn, and 1 can of Cannellini beans, then process 3/4 of the remaining beans along with 1/4 cup broth from the soup in a food processor until pureed, add bean mixture to soup along with remaining 1/4 can of beans (you can skip the pureeing step and just add the beans directly to soup, the soup just won’t be quite as creamy). Simmer about 15 minutes longer. Mix in fresh lime juice and serve with Monterrey Jack cheese, chopped cilantro and tortilla chips for dipping if desired.

Thanks, Cooking Classy!

DSC_0461

Cheddar Cheese Cracker Recipe

INGREDIENTS

4 tablespoons of shredded cheddar cheese
I also used a little bit of ground black pepper for some zing

DIRECTIONS

Preheat oven to 375

On a cookie sheet lined with parchment paper, drop a tablespoon of shredded cheddar cheese into four separate piles. Make sure they have at least 2 inches space between them.

Bake in oven for roughly 10-15 minutes. You want to to look for a golden brown color around the edges.

Pull out of oven and let cool for 10-15 minutes.

Thank you, nobunplease.com!